How to Optimize Your React App With Loadable Components

A good developer is always keen to find, learn and adapt new ways to optimize the app that he/she is working on. ‘Loadable Components’ is such a package that helps you to optimize your react app in numerous ways.
Let’s find out about its features.
Component Splitting
This feature allows you to load the components separately that are not necessary to load during the initial load. So that it will help to reduce the initial loading time.
It’s not mandatory to provide a fallback UI with this even though it’s something good to have for a better user experience.
import { useState } from "react";
import "./App.css";
// import ComponentA from './components/ComponentA';
import loadable from "@loadable/component";
const ComponentA = loadable(() => import("./components/ComponentA"));

function App() {
  const [state, setState] = useState(false);
  return (
    <div className="App">
      <button onClick={() => setState(!state)}>Update State</button>
      {state && <ComponentA fallback={<p>Loading..........</p>}/>}
    </div>
  );
}

export default App;
According to the above code, when the user clicks on the button, ComponentA will get rendered into the DOM.
The below screenshot was taken during the test that I did without using loadable-components (Which means I have uncommented line 3 from the above code and commented lines 4 and 5.)
In that scenario, ComponentA is also in bundle.jstogether with all other codes. That means the app has used its resources to load ComponentA during the initial rendering of the app, which is not necessary as ComponentA is something that we need only after we click the button to render it. Hence the initial loading time is recorded as 66ms.
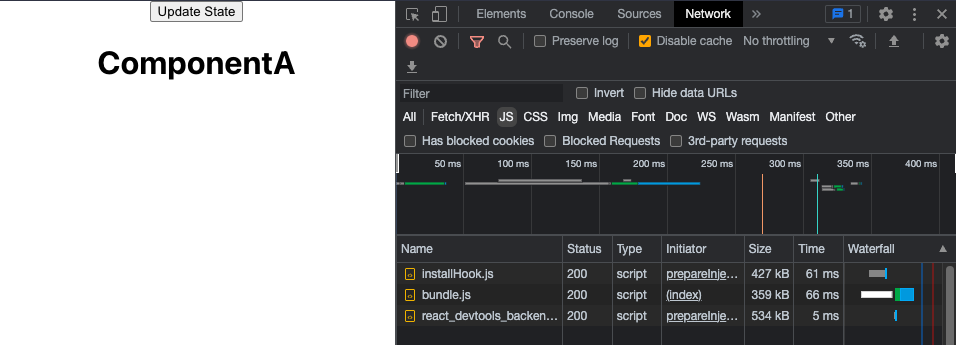
The below screenshot was taken during the test that I did while using loadable-components. (Which means I used the previous code exactly as it is). This time the componentA has got loaded as a separate component (src_Components_Com…). So that it has not bothered the initial rendering. Hence the initial loading time of bundle.js has been reduced to 63ms. The size of bundle.js has increased because we had to import loadable-components package (line 4) to make things work.

Library Splitting
This is something new that you won’t get from React library. This will allow you to import the libraries that you need for a specific task only when the need arises. So that it will reduce the load that will be put on the initial rendering of the page. Here also, It’s not mandatory to include the fallback prop.
import { useState } from "react";
import "./App.css";
import loadable from "@loadable/component";
const Moment = loadable.lib(() => import("moment"));

function App() {
  const [state, setState] = useState(false);
  return (
    <div className="App">
      <button onClick={() => setState(!state)}>Update State</button>
      {state && (
        <Moment fallback={<p>Loading..........</p>}>
          {({ default: moment }) => moment("2026-02-23").fromNow()}
        </Moment>
      )}
    </div>
  );
}

export default App;
Full Dynamic Import
With the help of this feature, you don’t have to worry about writing an import statement for every component that you need. You just need to pass the file name as a prop to the common component (in this case DynamicComponent) and the rest will be taken care of by loadable-components.
import "./App.css";
import loadable from "@loadable/component";

const DynamicComponent = loadable((props) => import(`./components/${props.page}`), {
  cacheKey: (props) => props.page,
});

function App() {
  return (
    <div className="App">
      <DynamicComponent page="ComponentA" />
      <DynamicComponent page="ComponentB" />
    </div>
  );
}

export default App;
Suspense
This feature is not something new to react devs as the same thing can be achieved by using React.lazy. When React.lazy method was introduced back in the day, It didn’t initially support server-side rendering. That issue was solved by this loadable-components. Because of that, the React team itself recommended using this loadable-components in its official documentation.
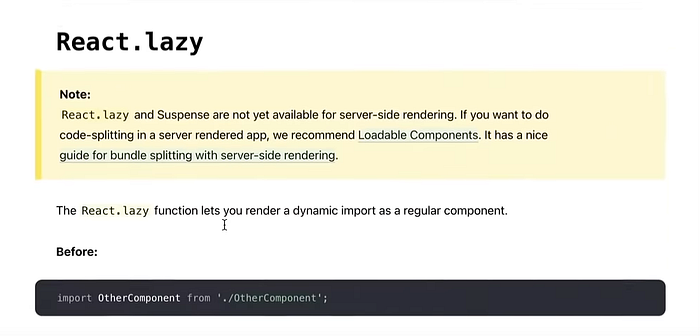
But later on, The react team released React 18 with the support of server-side rendering for suspense. So now they have removed this recommendation from their documentation.
import React, { Suspense } from 'react'
import { lazy } from '@loadable/component'
const OtherComponent = lazy(() => import('./OtherComponent'))
function MyComponent() {
  return (
    <div>
      <Suspense fallback={<div>Loading...</div>}>
        <OtherComponent />
      </Suspense>
    </div>
  )
}
Prefetching
If you want to load a component when the browser is idle (which means that the component is not a high-priority one to be loaded during the initial loading), you can add a ‘magic comment’ (from webpack) inside your import statement.
import loadable from '@loadable/component';

const ComponentA = loadable(() =>
  import(/* webpackPrefetch: true */ './ComponentA'),
)
Let’s talk about some specific scenarios that we’ll have to deal while using this library.
Handling Errors
If a module gets failed to get loaded due to a network failure or any other issue, without rendering a blank page on the app, you can use an error boundary to handle the situation in a nicer way.
import ErrorBoundary1 from './ErrorBoundary1'
const ComponentA = loadable(() => import('./ComponentA'))
const ComponentB = loadable(() => import('./ComponentB'))
const MyComponent = () => (
  <div>
    <ErrorBoundary1>
        <ComponentA />
        <ComponentB />
    </ErrorBoundary1>
  </div>
)
Flashing of the Loading Page
If the page load is getting done in a much faster way, you might notice that the loading page gets appeared for a few milliseconds and then gone. In some cases, that might not give a good impression to the user. To solve this issue, you can use p-min-delay package to add a small delay for the package loading, allowing the loading screen to appear at least for a second.
import { useState } from "react";
import "./App.css";
import loadable from "@loadable/component";
import pMinDelay from 'p-min-delay'


const ComponentA = loadable(() => pMinDelay(import("./components/ComponentA"), 1000));

function App() {
  const [state, setState] = useState(false);
  return (
    <div className="App">
      <button onClick={() => setState(!state)}>Update State</button>
      {state && <ComponentA fallback={<div>Loading.....</div>}/>}
    </div>
  );
}

export default App;
Manually Preloading
To forcefully preload a component, you can use preload() method on the component that you imported using loadable.
import loadable from '@loadable/component'
const ComponentA = loadable(() => import('./ComponentA'))
function App() {
  const [show, setShow] = useState(false)
  return (
    <div>
      <a onMouseOver={() => ComponentA.preload()} onClick={() => setShow(true)}>
        Show Element
      </a>
      {show && <ComponentA />}
    </div>
  )
}
Wrapping it up
In this article, we have discussed some important features of Loadable Components package to improve the performance of your react app.
Component Splitting, Library Splitting, Full Dynamic Import and Suspense are great features to get added in to your project. Use them wisely and make your projects great!
Thanks for taking the time to read this. I hope this was helpful. If you have any doubts, feel free to leave a response.
Resources
Loadable Components Docs - https://loadable-components.com/docs/getting-started/